

Got a desire of watching any videos to iTunes on Windows or Mac? Why can’t I add my AVI or MKV files to iTunes? What are the best video formats for iTunes? These questions may often happen among our users, right? In the following article, we are going to offer you two free best solutions to make AVI and MKV available with iTunes. Another better method is also deserved to have a try.
iTunes only supports MP4 and QuickTime format video files, so many of the videos you come across on the web can’t be added directly to iTunes or transferred to an iPod, iPhone, or iPad. Luckily, this problem is easy to solve — all you have to do is convert the videos to MP4 files using one of the tools below. Once you have, you can add them to iTunes and use them like any other file iTunes supports. Also, AVI and MKV are both concluded.
Method 1.HandBrake—Windows and Mac
HandBrake, you must be familiar with this professional converting assistant if you are interested in the video formats. AVI and MKV are both easy to convert with HandBrake, but HandBrake can also convert DVD videos and a wide variety of other video formats you might come across. You can select your conversion settings in just a few seconds or spend a while tweaking them in detail, whichever you prefer. Here are several steps to handle the HandBrake well.
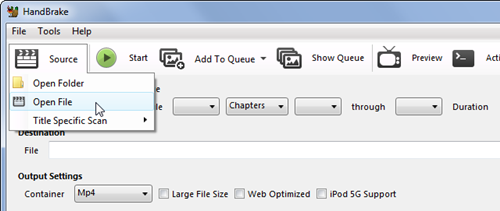
The interface can look a bit confusing at first, but it’s actually very easy to use. After installing and launching HandBrake, click the Source button on the toolbar, select Open File, and open your AVI or MKV file.
Next, click the Browse button under Destination, choose the folder the new MP4 file will be saved to, and enter a name for it.
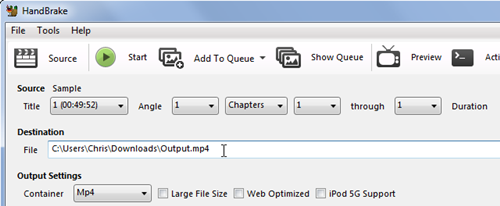
Under Output Settings, the MP4 container format should be selected by default. HandBrake can also create MKV files, but iTunes doesn’t support those.
If you don’t want to do anything extra, you can now just click the Start button and HandBrake will convert your video to an MP4 file. You can then import the resulting MP4 file into iTunes and move it to your mobile device; everything should work normally.
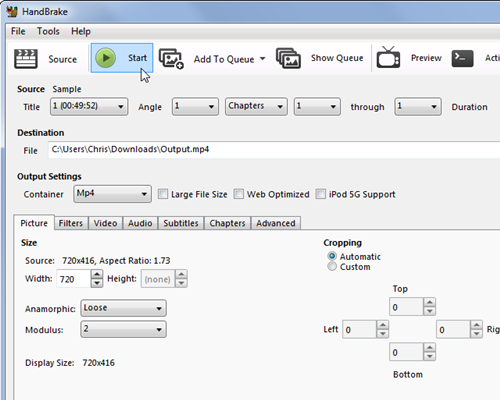
Notes: If you’d like to set more quality settings, you can click around using the tabs at the bottom before clicking the Start button. You can enjoy it!
Method 2.VLC—Windows and Mac
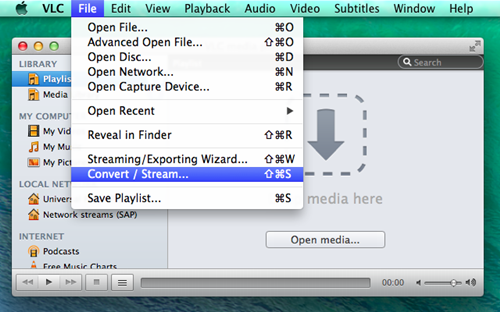
You probably already have the free and open-source VLC media player installed, so why bother downloading another application? VLC is packed with hidden features, and a video converter is one of them. To get started on Windows, click the Media menu and select Convert / Save. On a Mac, click the File menu and select Convert / Stream.
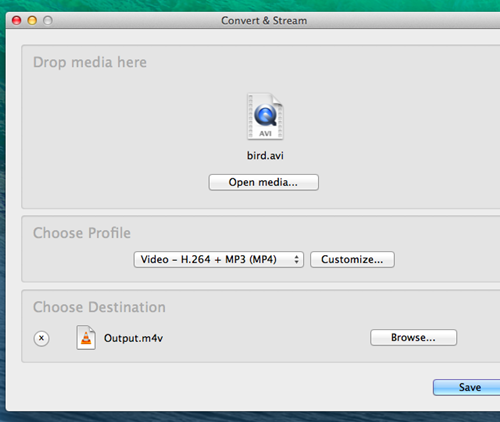
Add the media file you want to convert, ensure the profile is set to Video – H.264 + MP3 (MP4), and save the output to a file. You can also customize the conversion profile settings if you like, but this isn’t necessary. This wizard looks a bit different on Windows, but it’s the same basic process — add a file, choose a codec, select a destination, and start the process. Once VLC is done transcoding the video, you’ll get an MP4 or M4V file you can import to iTunes and transfer to your mobile devices.
Of course, you can use almost any video converter to convert a video file to MP4 format and add it to iTunes. The above options are some of the best, but any video converter will do.
Another better choice—Pavtube Video Converter for Windows/Mac
Unfortunately, there will be some quality loss involved with measures above. This is the nature of video compression. While in order to get the output videos with little quality loss, we here recommend you another professional AVI/MKV Video Converter to help us a lot. With the strong ability of working most popular NLEs and media players as output choices. For other iTunes unsupported video formats such as Xvid or WMV, it can work well. So this converting program is loved by our users. From AVI/MKV to MP4 with a high quality preserved, let’s learn some steps below.


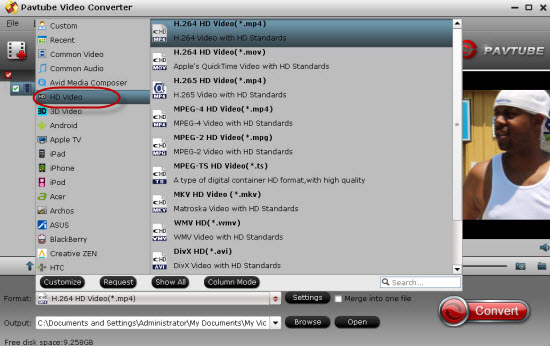
Launch this AVI/MKV video converter and step into the main interface if you have installed correctly on your computer. With ‘Add File’ we can easily load the original files in. Then we suggest you to go to the output list to choose the ‘HD Video’>>’H.264 HD Video (*.mp4)’ as the bet one.
Additional tips: for those advanced users, you may wanna some other functional items to adjust your videos, right? Don’t worry, with ‘Settings’ or ‘Edit’ buttons, we can adjust out video and audio parameters so nicely.
Finally, as soon as you have done all the preparation work, it’s time to go back to the main interface to hit the big button ‘Convert’ to get the cork started. After you get the output files, just transfer them to iTunes as usual on Windows and Mac. That’s the easiest way we wanna to introduce to you.
More from my site
 HEVC Encoder/Decoder for iPhone 6 – Watch H.265 Videos on iPhone 6
 How to Import TiVo Recordings to iTunes Library on Mac 10.10 Yosemite
 Play Flash Videos on iPhone/iPad/iPod Touch?—Flash Video Player
- Convert BDMV Files for QuickTime, iMovie, FCP on Mac Perfectly
 Fix Issues between MOV and iTunes, iPhone, iPad—Incompatibility?
 WMV to iTunes Workflow: Play WMV Files on Apple Devices via iTunes


Hi, my name is Catherine and I was just looking at your Convert AVI/MKV Files to iTunes on Windows/Mac | Video Pedia site, this is really a superb converter to me … l like it very much!!!!!!!!!!