

Any good suggestions there we can take to make QuickTime read the WAV files on Yosemite? Isn’t it true that QuickTime can support the WAV audio files? In this article we can explain that QuickTime sometimes cannot support the WAV audios and also teach you how to add WAV files to QuickTime so nicely.

Most computer multimedia programs play music stored in the WAV file format, which has been around since the early days of personal computing. The MacBook comes standard with the Quicktime multimedia program, which recognizes WAV files as well as several other file formats. In this case, why someone there still ask for the answers to smoothly play WAV files on QuickTime on Yosemite? Let’s find more details below.
Hot Search: AVCHD to QuickTime | XAVC to QuickTime | MXF to QuickTime | MTS to QuickTime
Though Quicktime plays most WAV files, a few proprietary sound-recording programs produce WAV files with custom formats. To play these, you need additional software called a “codec.” The recording program’s vendor may offer the codec as a separate download. If not, Quicktime cannot play the files. That’s the cause why some WAV files cannot be supported by QuickTime there.
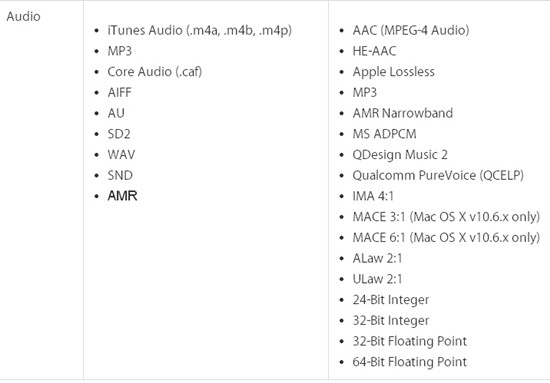
So how could we make all WAV files playback well on QuickTime on Yosemite? That’s the key point. Why not transcode the WAV files to the QuickTime best supported audio files for smoothly playback? Fortunately, the best supported audios are listed below you can take as the reference.
On the other way, we would also like to introduce you the professional audio transcoder for you—Pavtube Video Converter for Windows, which could also be a strong video converter for any video conversion work. With the high audio quality preserved, we are glad to tell you how to work this audio transcoder to work WAV files well with QuickTime on Yosemite. Just follow the steps to get more.


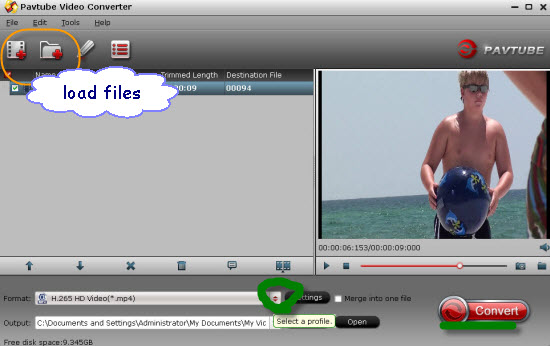
Step 1. As soon as we free download and install the program on our PC, open the main interface to click the ‘Add files’ we can easily load the original files in.
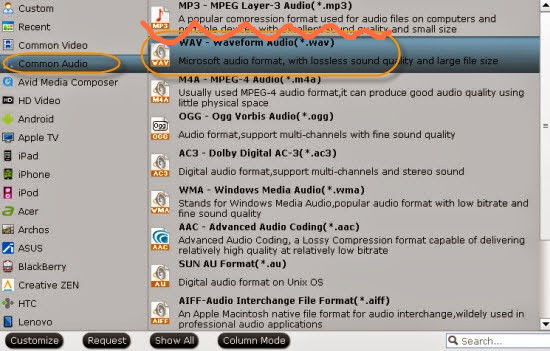
Step 2. Find the best output audio format for QuickTime Player. As we mentioned above, we will find that the MP3 could be the most suitable one. So just come to the output list to get the ‘Common Audio’>>’MP3-MPEGLayer-3 Audio (*.mp3)’ as the nice one.
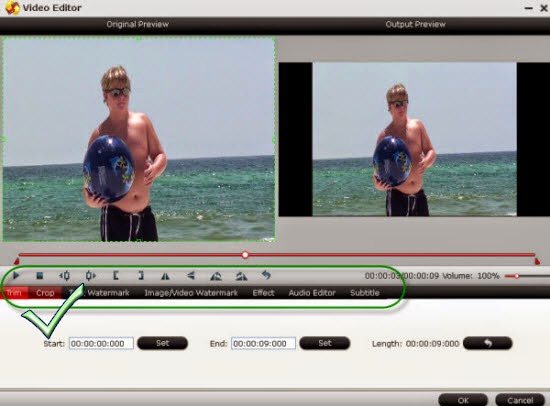
Step 3. Get into the ‘Settings’ button, don’t forget to set the audio codec as ‘MP3’ and in the ‘Edit’ interface, the equipped built-in editor tool allows you to trim the video length, so you can get your desired audio. Here you can drag the slide the block to decide where to start and where to end by ‘Trim. etc.
Finally, back to the main interface, ‘Convert’ button is waiting there for us to get started! So in this way, normally, the audio files may not have the big size so we have no needs to wait for a long time. Smoothly play your WAV files on QuickTime Player on Yosemite, are you still now worrying about the incompatible troubles?
More from my site
 Edit Sony (MPEG2 SD) Camera Videos in Pinnacle for Uploading YouTube or Making DVDs
 Best Free Online Programs to Convert MOV to MP4
 Encode H.265/HEVC video with FFMPEG Alternative
 How to Convert Any Video File to Other Video Format Freely?
 How to Import TiVo Recordings to iTunes Library on Mac 10.10 Yosemite
 Good News for Pavtube Video Converter for Mac— Upgrade to Version 4.8.5.0!


