

Have you found that most video editing software render files are very large, such as Adobe Premiere render file, Affect Effects render file. Actually, a large file is not convenient for transfering, sharing, and sotring. How to reduce the Premiere/After Effects render file size has become a common question in some flimmaker forum. Some guys try to reduce the render file size by adjust the output format settings in Premier and After Effects, but this approach is woefully ineffective. Any suggestion? Keep reading.
So today I will recommend you another way to settle this problem with just 3 steps. The premise is that you have to download a professional video compressor – Pavtube Video Converter Ultimate is highly recommended to you which could reduce Premiere file size by changing video formats for you. Hundreds of video formats for you, MP4, MOV, AVI, M4V, MKV, WMV, etc all those popular formats are available here. Moreover, it offers you tons of optimized devices presets, like Android smartphone, iPhone, iPad, TVs, ASUS, Samsung smartphone, and more with the best video/audio settings, so you need not to do any change.
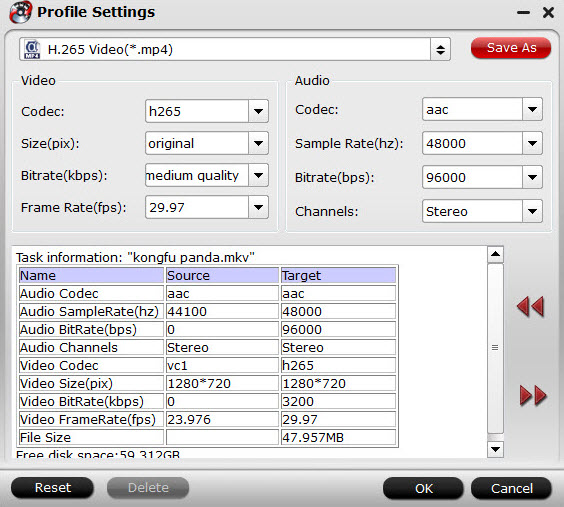
The most efficient way to compress Premiere/After Effects render file size is to lower video bit rate. You can do this in its "Profile Seetings" window. Besides, you can directly choose video format, then adjust the video and audio bitrate, frame rate, resolution, channel and more parameters to make the outputed video more fit in your video player and multimedia devices. With this feature, you even can compress 4K to 1080p video or upscale lower resolution video to higher resolution video.
Apart from a video compressor, Pavtube Video Converter Ultimate is also a video editor with rich video editing functions. It can fulfill all the needs of making a professional video for public consumption or simple creativity trying. With it, you can merge separate video clips into one, insert external subtitles to video, add transparent text watermark/image watermark to video, crop black bars around the video frame. More features in this guide for you.
Download:
Pavtube Video Converter Ultimate | Pavtube iMedia Converter for Mac
Step by Step to Reduce Premiere/After Effects Render File Size
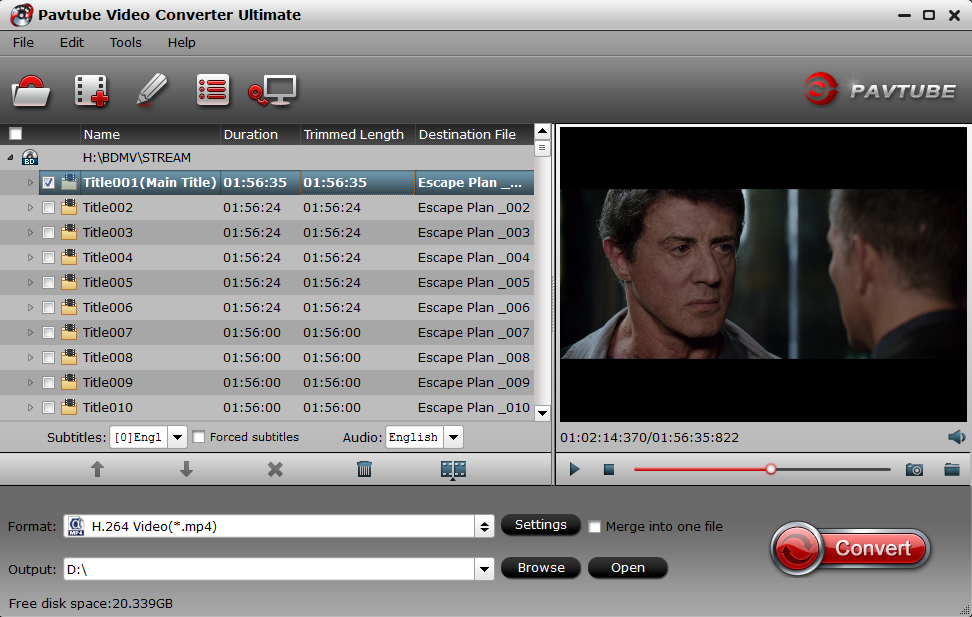
Step 1: Launch this assistant on your Windows, click the "Load file" or "Add Video" icon on the main interface to import Premiere/After Effects render files into the program. Or you can directly drag or drop video into this converter.
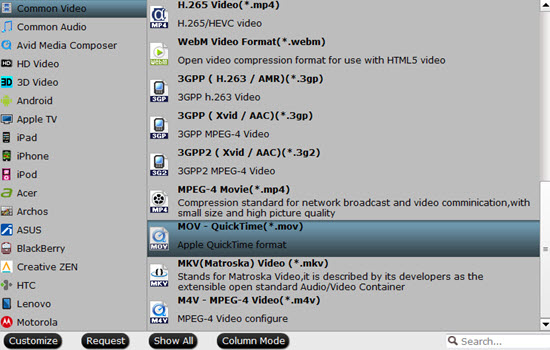
Step 2: Click "Format" bar, you will see hundreds of video format here. You can navigate to "Common Video" and select "MOV- QuickTime(*.mov)". If your media player could support HEVC/H.265 file, you can choose H.265 Video (*.mp4) to get a smaller file.
Tips: Compare to HEVC’s precedent – AVC, aka H.264, HEVC promises a 50% storage reduction as its algorithm uses efficient coding by encoding video at the lowest possible bit rate while maintaining a high image quality level.
Step 3: This part is important. After you select desired format, click "Settings" and enter "Profile Settings" window, you can adjust video parameters here. The video size is based more on bit rate than pix, lower bit rate to get smaller video size. I always select medium quality or low quality to reduce Premiere/After Effects render file size.
Step 4: Go back to main interface, and hit "Convert" button, wait for a second, click "Open" it will pop up a folder with the converted file. Then you can easily to upload to Youtube or other video social video sahring website.
Related Articles
- How to Convert After Effects MOV Files to SWF for Web?
- How to Edit MKV, AVI, VOB, MTS, TS, MP4, FLV in After Effects CC Smoothly?
- Can After Effects CC Support Canon C300 MXF Files on Windows 8.1/Mavericks?
- Tricks for Editing 4K videos in After Effects CC
- Free Ways to Compress Big MKV File on Mac/Windows
Any Product-related questions?support@pavtube.com