

Why need to make a video file smaller
There are many reasons why you should compress or change the format of your videos in order to make them smaller. For one reason, most social media sites such as YouTube, Facebook limit the size of the videos you can upload to their sites and rightly so. Second, emailing or sharing the video with friends or family members can be a problem if they do not have a fast speed connection or limited data usage from their carrier, it will make downloading those big size videos files from you take forever. Lastly, converting the videos to smaller sizes also saves you time and space on your device.

How to Compress Video
When talking about compressing video file size, most of the two common ways people usually utilize is shortening video length or changing video format. As a matter of fact, there are still many other elements that can effect your video file size, the following article will list 8 different ways to make video file size smaller with real compressing tests by using our program Pavtube Video Converter.
Before the testing, make sure to download and install the program on your computer, for Mac users, you can perform the testing with Pavtube Video Converter for Mac (best Mac video converter) on Mac OS X El Capitan. Import the movies or video that you want to compress file size into the program, then get started with us.
Related article: Best Way to Compress 4K/1080p Video without Quality Loss
Tips: When we using one compression way, we will only change the related value and keep others unchanged.
1. Shorten video length
Shorten time length is the top way users are inclined to use, cut off the unwanted parts such as the introduction or the ending parts of a movie. But how the video file size will change when using this method, let’s begin the testing in the video editing windows of the program, set the start time and end time to have only you wanted parts to be converted. Make sure to output the same format as the original file format and keep all other video and audio setting such as codec, bit rate, frame rate, resolution, sample rate, channels, etc as default. Hit the “Convert” button to begin the video length shortening process, take a look how video file size are changed before and after the conversion.
|
Settings |
Before |
After |
|
Format |
MP4 |
MP4 |
|
Size |
5.9GB |
5.6GB |
|
Duration |
02:34:23 |
02:25:29 |
|
Resolution |
1920*1080 |
1920*1080 |
|
Time to Complete |
00:10:02(Hour:Minute:Second) |
2. Convert to another file formats.
Change the output file format to a WMV (small file size for emailing or storage)
The result is high depend on which format users choose, if choose AVI or MOV as the
output format, the video size after converted will be still 5.9G, if DivX, the size will be bigger than the original one. Therefore, you may need to distinguish the different video formats before using this function or you may need to check one by one. The video codec of WMV including WMV 1, WMV 2, WMV 3 will also effect the compression video file size.
|
Settings |
Before |
After |
|
Format |
MP4 |
WMV |
|
Size |
5.9GB |
2.3GB |
|
Duration |
02:34:23 |
02:34:23 |
|
Resolution |
1920*1080 |
1920*1080 |
|
Time to Complete |
06:00:12(Hour:Minute:Second) |
|
3. Change video encoder from H.264 to MPEG-4
As two mainly compression codecs standards, H.264 is the high compression rate that is about 2 times more efficient than MPEG-4 encoding. According to tests, when
we use H.264 to compress MP4 to MP4, nothing changes. However, when using MPEG-4 codec to compress MP4 to MP4 file, it enlarge the file size instead compressing the file size.
|
Settings |
Before |
After |
|
Format |
MP4 |
WMV |
|
Size |
5.9GB |
109GB |
|
Duration |
02:34:23 |
02:34:23 |
|
Resolution |
1920*1080 |
1920*1080 |
|
Time to Complete |
12:59:04(Hour:Minute:Second) |
|
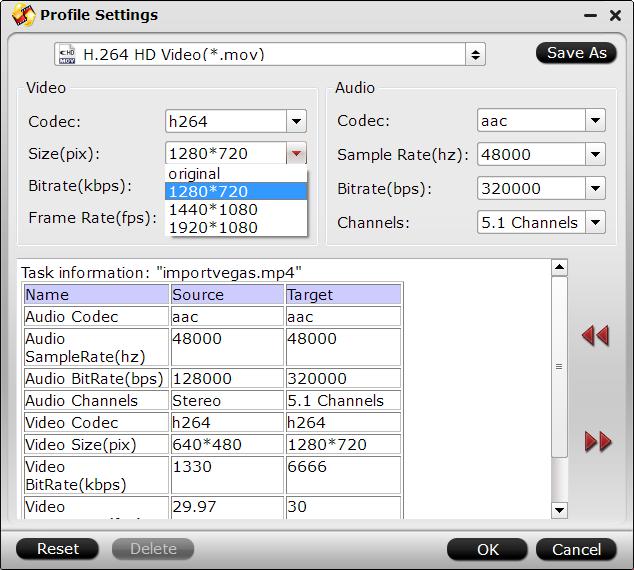
4. Adjust resolution
There are many different resolutions in settings and the tests will only take 3 examples to see what will happen when changing the resolution to compress a video.
|
Settings |
Before |
After 1 |
After 2 |
After 3 |
|
Format |
MP4 |
MP4 |
MP4 |
MP4 |
|
Size |
5.9GB |
424MB |
1.4GB |
4.5GB |
|
Duration |
02:34:23 |
02:34:23 |
02:34:23 |
02:34:23 |
|
Resolution |
1920*1080 |
240*160 |
640*480 |
1280*720 |
|
Time to Complete |
01:46:03 |
02:12:26 |
06:41:59 |
Resolution options in this software
5. Different Frame Rates like 15fps, 30fps and 60fps
Let’s keep other settings unchanged and only change the Frame Rates.
|
Settings |
Before |
After 1 |
After 2 |
After 3 |
|
Format |
MP4 |
MP4 |
MP4 |
MP4 |
|
Size |
5.9GB |
8.8GB |
8.8GB |
8.8GB |
|
Duration |
02:34:23 |
02:34:23 |
02:34:23 |
02:34:23 |
|
Resolution |
1920*1080 |
1920*1080 |
1920*1080 |
1920*1080 |
|
Frame Rate |
15FPS |
30FPS |
60FPS |
From the tests, we can see that when you choose different Frame Rates, the output video file size is bigger than original one, the original video is only 5.9GB, while the output video is 8.8GB.
6. Different Bit Rate like 512kbps, 1000kbps and 3000kbps
You can change the Bit Rate when the final video enlarged the original one, which can’t achieve the compress purpose. Let’s focusing our attention on the test.
512KBPS -The compressed video size is 706.7MB, it takes 04:11:48 to complete this task.
1000KBPS – The final video size is 1.2GB, it takes 04:24:35 to complete this task.
3000KBPS – The layout video size is 3.4GB, it takes 05:44:31 to complete this task.
No matter which Bit Rate you choose, it can change the video size to some extent.
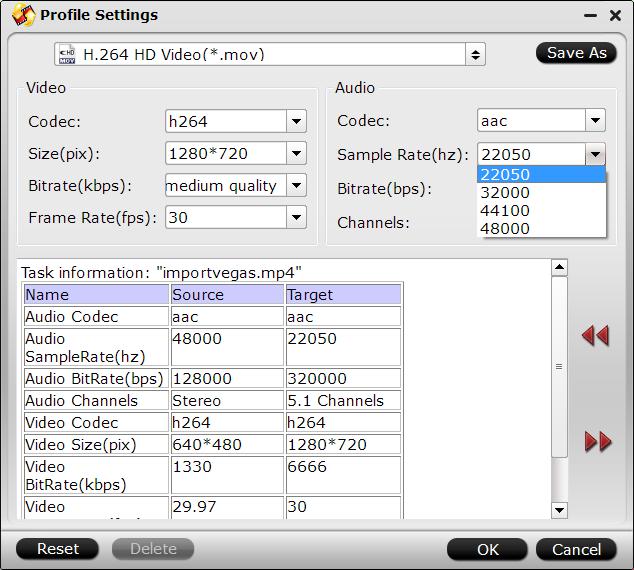
7. Change Audio Sample Rate from 22050 Hz to 48000 Hz
There are 4 Audio Sample Rates users can be changed to compress videos to different size. Here we will try 22050 as example.
Import the video and click “Settings” to open the “Profile Settings” window, set up Audio Sample Rate to 22050 Hz and keep others default. However, there is nothing happened for this change. Under this situation, you may need to change other parameters to step forward. Therefore, users can’t tell the differences from the original video.
8. Adjust Audio Bit Rate from 64 kbps to 320 kbps
When change Audio Bit Rate, like Audio Sample Rate, there is not any changes in setting preview. However, it matters a lot if you want to compress your video to MP3 file.
Click Settings, there will be brand-new setting window different from any previous test, let’s compare the 64KBPS with 320KBPS:
|
Setting |
Before |
After 1 |
After 2 |
|
Format |
MP4 |
MP3 |
MP3 |
|
Size |
5.9GB |
70.7MB |
353.4MB |
|
Duration |
02:34:23 |
02:34:23 |
02:34:23 |
|
Resolution |
1920*1080 |
- |
- |
|
Audio Bit Rate |
Keep Original |
64KBPS |
320KBPS |
|
Time to Complete |
00:19:54 |
00:25:55 |
Summary:
We have tested 8 ways to compress video to small file size with Pavtube Video Converter, you can make suitable choice according to your own needs or situation.
More from my site
 Make MOV Smaller: Compress QuickTime MOV on Mac/PC
 Upload PowerDirector File to YouTube
 Upload MP4 videos from iPhone/iPad to Youtube
  How to Compress AVI File to Small File Size on Windows Mac?
 Best way to Compress 4K/1080P HD Video Size without Losing Quality
 Compress Video for YouTube for Fast Uploading Speed and Best Video Quality


