

For Cyberlink PowerDirector users, once you have finished editing your video production, you can upload it to social networking web sites for sharing with more audience. The following article will share 2 different ways to upload PowerDirector file to YouTube.
Method 1: Upload PowerDirector file to YouTube via Cyberlink PowerDirector
CyberLink PowerDirector offers a Produce option that allows you to upload your video directly to YouTube. That way your video can be easily accessible via a URL link. To upload a high quality video to YouTube, follow the steps below:
1. Click on Produce and then select the YouTube tab.
2. Enter your account information to log in to YouTube.
3. Select the profile type from the drop down menu. If you want your video to display in the HD or high quality, select one of those options.
4. Enter a title make a brief description about the video, and then add some search tags.
5. Select a video category and then whether to make it public or not.
6. Click Start to begin producing the video. The video is uploaded to your YouTube account once it is produced.
Method 2: Convert PowerDirector file to YouTube with Pavtube Video Converter
For those people who wish to get the best uploading settings for YouTube, we highly recommend you to download Pavtube Video Converter. With the program, you can easily convert exported PowerDirector file to YouTube best favorable uploading settings listed below:
Container: MP4
Audio codec: AAC-LC
Channels: Stereo or Stereo + 5.1
Sample rate 96khz or 48khz
Video codec: H.264
Progressive scan not interlacing
High Profile
2 consecutive B frames
Closed GOP. GOP of half the frame rate.
CABAC
Variable bitrate, no bit rate limit required, though we offer recommended bit rates below for reference,
Chroma subsampling: 4:2:0
Frame rate
Content should be encoded and uploaded in the same frame rate it was recorded.
Common frame rates include: 24, 25, 30, 48, 50, 60 frames per second (other frame rates are also acceptable).
Interlaced content should be deinterlaced before uploading. For example, 1080i60 content should be deinterlaced to 1080p30, going from 60 interlaced fields per second to 30 progressive frames per second.
Bitrate
The bitrates below are recommendations for uploads. Audio playback bitrate is not related to video resolution.
Resolution and aspect ratio
YouTube uses 16:9 aspect ratio players. If you’re uploading a non-16:9 file, it will be processed and displayed correctly as well, with pillar boxes (black bars on the left and right) or letter boxes (black bars at the top and bottom) provided by the player.
Time and file size limitations for YouTube video upload
Size: Up to 128GB
Length: By default, you can upload videos that are up to 15 minutes long, but you can upload longer videos by following the steps below to verify your account.
1. go to the upload page at youtube.com/upload.
2. At the bottom of the page, click Increase your limit. You can also go directly to https://www.youtube.com/verify.
3. Follow the steps to verify your account. You can choose to receive a verification code through a text message on a mobile phone or an automated voice call.
4. Once you’ve verified your account, you can upload videos that are longer than 15 minutes long.
Here, with our program, you can not only convert PowerDirector file to YouTube best compatible H.264 High Profile MP4 video and AAC audio formats. But also get YouTube best compatible uploading settings by flexibly adjust output profile settings including video codec, resolution, bit rate, frame rate, audio codec, bit rate, sample rate, channels, etc in the program’s “Profile Settings” window.
Trim/Compress/Adjust output aspect ratio of Powerdirector file
If your PowerDirector file is longer than 15 minutes, you can shorten the video length with the trim function to cut off unwanted parts in the video. If your PowerDirector file size is large than 128GB, you can compress the file by lowering output video resolution, bit rate or frame rate. If the PowerDirector file is using an aspect ratio that doesn’t adapt with YouTube, you can change output video aspect ratio to 16:9 with the “Crop” function in the video editing window.
For Mac users, you can switch to download Pavtube Video Converter for Mac to produce YouTube best uploading settings from PowerDirector file on macOS High Sierra, macOS Sierra, Mac OS X El Capitan, Mac OS X Yosemite, etc.


Step by Step to Convert PowerDirector Files to YouTube Best Uploading Settings
Step 1: Add PowerDirector files.
Install and run PowerDirector file to YouTube Converter. You can simply drag and drop the PowerDirector file one by one to this YouTube converter. Or import the PowerDirector files through “File” > “Add Video/Audio”.

Step 2: Choose YouTube best supported video format.
Scroll down the “Format” drop-down options, select YouTube best compatible uploading settings “H.264 High Profile Video(*.mp4)” under “Common Video” main category.

Tips: Click “Settings” on the main interface to open “Profile Settings” window, here, you can flexibly adjust the output profile parameters including video codec, resolution, bit rate, frame rate, audio codec, bit rate, sample rate, channels, etc to let them fit with YouTube best uploading settings listed above.
Step 3: Trim/Compress/Adjust output video aspect ratio.
Trim video length
In the video editor window, choose the “Trim” tab and this tab is selected by default when the editing window appears. You can use the trim function to cut off unwanted parts from start and end. You can either drag pointers on the process bar or set exact time point in Start and End boxes to set.

Compress video file size
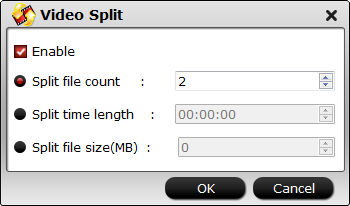
Click “Settings” to open “Profile Settings” window to lower output video resolution, bit rate or frame rate or split large video into small parts by file size, count or length.
Adjust output video aspect ratio
Go the “Crop” tab in the “Video Editor” Window, switch to the “Advanced Mode”. To change output video aspect ratio, there are several aspect ratios for you to choose from, including 16:10, 16:9, 5:4, 4:3, 3:2, and 2:1, you can choose YouTube accepted aspect ratio 16:9. Once you select a “Display aspect ratio”, the “green crop frame” will keep this ratio to crop video and you are able to preview the final effect in real time. If you want to keep the same aspect ratio in your final output files, do remember to set the Video “Size (pix)” in “Settings” section as the same ratio as display aspect ratio.

Step 4: Start the conversion process.
Start PowerDirector file to YouTube best upload format, settings, video length, file size, aspect ratio conversion process by hitting the right bottom convert button.
When the conversion is over, you can then get the best uploading settings when sharing PowerDirector file on YouTube.
More from my site
 Upload (QuickTime) MOV to YouTube on Mac
 Upload DVD to YouTube Smoothly With Best Quality
  MP4 to YouTube – Convert unsupported MP4 to YouTube supported MP4 video
- No difficulties Uploading GoPro Hero5 4K videos to YouTube
 Insert Youtube (FLV) into PowerPoint 2016, 2013, 2011, 2010, 2009, 2007… On macOS Sierra
  How to Convert Video to YouTube Supported Video Formats on Mac


