

Although the QuickTime mov is the supported uploading file formats for YouTube, however, a lot of people still fail or unable to smoothly post the QuickTime MOV file to YouTube just the conditions listed below:
“My quicktime player keeps telling me ” can not upload a video longer than 15 minutes” and that I need to clip it. However…my You Tube settings are verified and state I am allowed to post longer videos. How do I get quicktime to recognize that I am allowed to post longer videos?”
Why fail to upload QuickTime MOV to YouTube?
It is well known that QuickTime MOV is comparatively large in file size than other file formats, however, YouTube has its own limitation on both file size and video length uploading limitation. Therefore, to achieve a smooth and successful file uploading process, make sure that your QuickTime file are less than 2GB, in addition, the video length would be less than 15 minutes.
Hot Search: Upload DJI Phantom Video to YouTube | Upload PowerDirector File to YouTube
Upload QuickTime MOV to YouTube uploading with best settings
To get YouTube accepted uploading file size and video length from QuickTime MOV files on Mac, you can download Pavtube iMedia Converter for Mac. Which not only assists you to convert QuickTime MOV to YouTube natively uploading FLV file formats, but also assist you to reduce video file size or shorten video length with no quality loss if the QuickTime MOV video is larger than 2GB or your video is longer than 15 minutes. You can split your large QuickTime file into small video clips by file size, count or length. If you do not care much about output video quality, you can also choose you compress large file size by lowering video resolution/bit rate/frame rate in the program’s “Profile Settings” window. To get your desired video length, you can use the “Trimming” function in the program’s “Editing” window to cut off unwanted parts or segments.
Besides QuickTime MOV files, you can also use the program to convert other compatible file formats such as AVI, WMV, MP4, MKV, AVCHD (MTS/M2TS), XAVC/XAVC S, MXF, H.265, etc into YouTube best compatible uploading formats, settings, file size and limitation.
Pavtube iMedia Converter for Mac is pretty simple to use, no matter experienced user or fresh could handle it very well.In addition, it also has perfect compatibility with the new Mac OS.What’s more, the program is very stable, there are hardly any sudden crashes during the video conversion process.


How to Convert/Trim/Split QuickTime MOV for YouTube Uploading?
Step 1: Load QuickTime MOV file.
Download the free trial version of the program. Launch it on your computer. Click “File” menu and select “Add Video/Audio” or click the “Add Video” button on the top tool bar to import QuickTime MOV file into the program. The program support batch conversion mode, you can load multiple QuickTime MOV files into the program.

Step 2: Choose output file format.
Clicking the Format bar, from its drop-down list, select YouTube best compatible uploading format “FLV – Flash Video Format(*.flv)” under “Flash Video” main category.
Tips: Click “Settings” on the main interface to open “Profile Settings” window, here, you can flexibly choose or specify exactly the profile parameters including video codec, resolution, bit rate, frame rate, audio codec, bit rate, sample rate, channels, etc as you like to get better output video and audio quality.
Step 3: Trim or split QuickTime MOV files.
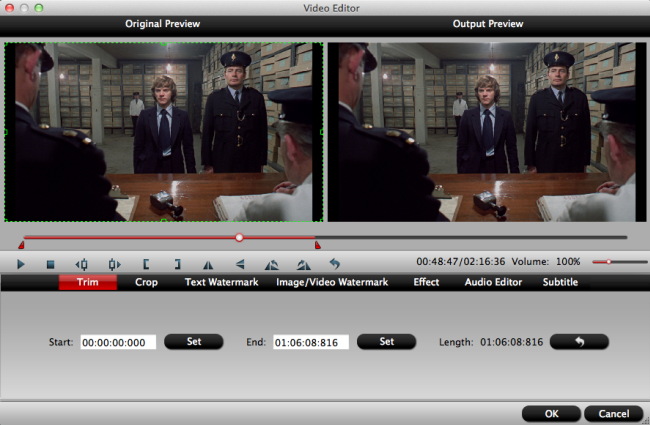
Trim QuickTime MOV files
In the video editor window, choose the “Trim” tab and this tab is selected by default when the editing window appears. You can use the trim function to cut off unwanted parts from start and end. You can either drag pointers on the process bar or set exact time point in Start and End boxes to set.
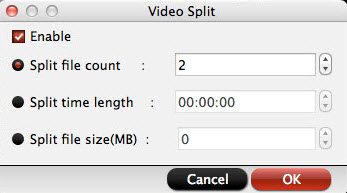
Split large QuickTime MOV files
Click the split button on the file list to launch the Video Split window. Ticking “Enable” option, you can split the file by file count, time length, or file size.
Step 4: Begin the final conversion process.
After all setting is completed, hit the “Convert” button at the right bottom of the main interface to begin QuickTime MOV to YouTube supported file formats, video length, file size conversion process.
When the conversion is finished, click “Open Output Folder” icon on the main interface to open the folder with generated files. Then you can smoothly upload and share QuickTime MOV files on YouTube with best quality.
More from my site
 Upload PowerDirector File to YouTube
 Upload DVD to YouTube Smoothly With Best Quality
  Trim/Cut QuickTime MOV Files on Mac Quickly
 MP4 to YouTube – Convert unsupported MP4 to YouTube supported MP4 video
 Make MOV Smaller: Compress QuickTime MOV on Mac/PC
- WeM to QuickTime Video Converter – Convert WeM to QuickTime MOV on Mac


