

When I was visiting the forums, I always saw people looking for a way to aid them in playing Blu-ray movies on Wii U. Question here: "I was just wondering if it (Wii U) can finally play CDs and Blu-rays directly from the disc drive." The answer is definitely Nope! For you guys who want to play any Blu-ray on this game console, I prepared two methods for you to watch Blu-ray movies on it. Go check!
Two Method for You to Play Blu-ray on Wii U
Method 1: The Wii U console does not play Blu-rays discs, but Wii U offers access to video-on-demand services such as Netflix, Amazon Instant Video, Hulu Plus, and YouTube. With this, you can watch online Blu-ray movies, however, there is no free lunch in this world, you have to pay for some of them. But for Blu-ray collectors, you have to choose Method 2 below.
Method 2: You need a third-part tool to help you achieve this goal. Pavtube BDMagic for Windows | for Mac is a professional Blu-ray Converter for Wii U. Blu-rays are popular for the excellent images quality, but every time we convert a Blu-ray video, the quality will be damaged. Don’t worry, Pavtube BDMagic integrates a strong algorithm, so you can rip Blu-ray discs to 4K, 1080p, 720p videos without quality loss. Then you can enjoy the perfect sound and picture quality of Blu-ray files on Wii U. Moreover, Pavtube BDMagic permits users to adjust some video and audio parameters before conversion.
Besides Wii U, the program also enables you to output Blu-ray to other game consoles such as PS4/PS4 Pro, Xbox One/Xbox One X specially optimized file formats for better playback. And the workflow to rip Blu-ray discs to Wii U is as simple as ABC.
Follow the step-by-step guide below to get your Wii U to play Blu-ray movies.
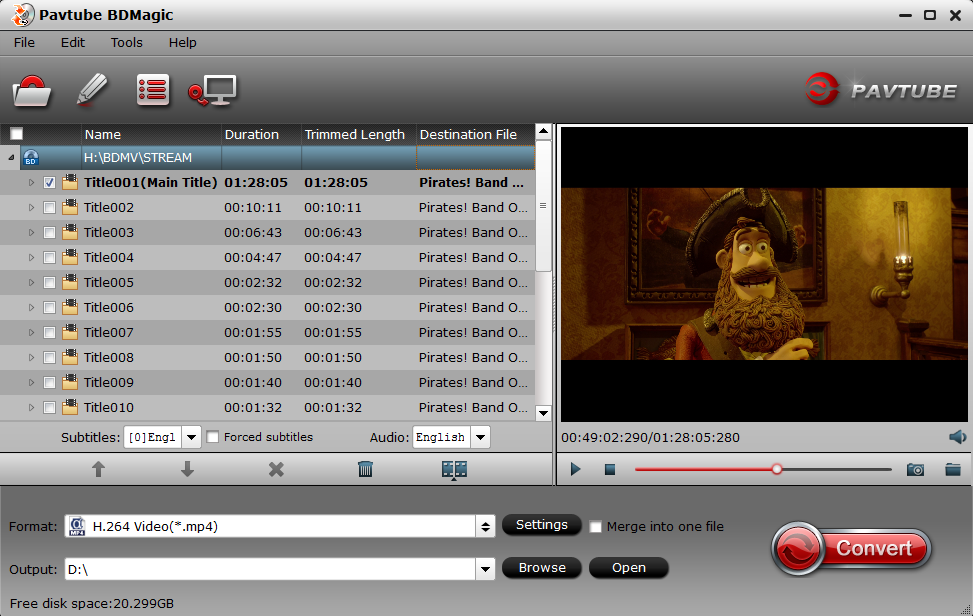
Step 1. Load Blu-ray Disc
Launch this Blu-ray to Wii U converter on Windows or Mac, and click "File">"Load from disc" to import Blu-ray movie.
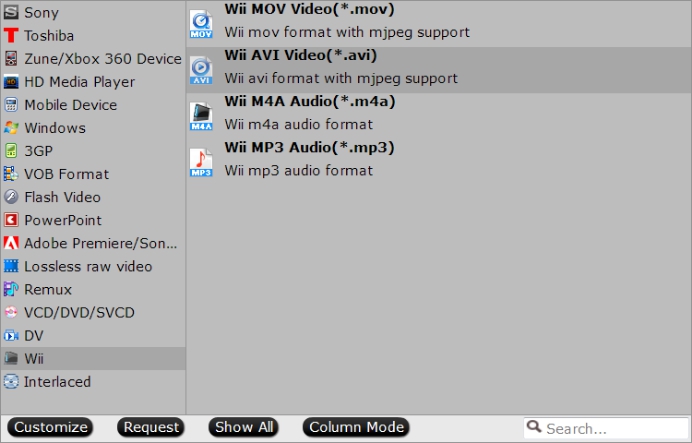
Step 2: Output Wii U preset profile format
Choose the format that Wii U readable in the list of Format. Since Wii U has the same format compatibility with Wii, here, you can output Wii preset profile format "Wii" > "Wii MOV Video(*.mov)" or "Wii AVI(*avi)".
Tips: If you want to convert Blu-ray to Wii U with multiple audio tracks/subtitles and chapter markers preserved, Pavtube ByteCopy for Windows/Mac will be a good choice. Run Pavtube ByteCopy and click the format bar to follow "Multi-track Video". There are 4 kinds of multi-track formats for you, choose the most suitable for your device.
Step 4: Click "Browse" button behind Format bar to pick a destination folder to store the output movie files.
Step 5: Once you press the big red "Convert" button, Pavtube BDMagic will start ripping and save the output files in the folder you set.
After the conversion, you can click Open output folder to pop out the output directory with the converted files. To watch local video on Wii U, the best way is copy movie files to your USB drive or external hard drive. Keep reading.
How do I hook up my USB Device to my Wii U?
Once you’ve got hold of your USB drive, it’s a simple process connecting it to your Wii U. First though, if you’re going to be using a USB drive you already owned, make sure you back-up everything you need off of it before you begin. You’ll need to format it to use it with the Wii U, and that process erases any and all data on the drive. It also makes it inaccessible to computers and other devices, so you’ll need to dedicate a HDD entirely to the Wii U.
Reference: Guide: Using USB Storage with the Wii U
Step 1: Make sure your Wii U is turned off.
Step 2: Plug the HDD into the USB port(s) on the back of the Wii U.
Step 3: If you’re using a drive with external power, make sure it’s plugged into its own power outlet. If you’re using a USB-powered drive, make sure you’re using a Y-cable and both USB ports on the back of the Wii U.
Step 4: Turn on your console. After a short wait, you should be prompted that you’ll need to format your USB device to use it with the Wii U.
Step 5: Select "Format" – remember, this will erase any data currently on the hard drive, and once you format a drive for the Wii U, you won’t be able to use it on a PC or Mac without re-formatting it.
Step 6: Once the formatting process is complete, you’ll be returned to the Wii U Menu, and a blue icon in the lower left-hand corner will indicate that your HDD is set-up and ready for use!
Related Articles
Any Product-related questions?support@pavtube.com