Summary: This article give you the solution to import all kind of camcorder video to FCP for editing smoothly.
Final Cut Pro is a non-linear video editing software which provides non-destructive editing of any QuickTime-compatible video format including DV, HDV, P2 MXF (DVCProHD), XDCAM (via plug-in), and 2K film formats.
But still there are lots of videos that cannot be imported for that it’s not the appreciated formats by Final Cut Pro, for example, AVCHD files from Canon XA series/Panasonic AG/Sony HDR, H.264 MOV from Nikon, etc.
Hot Search: XAVC S with FCP | H.264 into Final Cut Pro | 4K Video with FCP
If your video formats are incompatible with the editor? Below is the solution:
1. Connect camcorder to Mac;
2. Copy the content from your camcorder to the Mac;
3. Convert the camcorder video format to Final Cut Pro compatible format.
So the easiest and most effective way to solve camcorder video import issue with FCP is convert it to Apple ProRes, a native and perfect format for Final Cut Pro.Here you need a video converter help you convert the all type camcorder video format into a FCP supported format. Pavtube HD Video Converter for Mac(read the review) can be convert all video format into Apple ProRes for FCP. Meanwhile you also can Convert camcorder video to MOV, MP4, AVI, MKV, WMV, MPG, M4V or any other formats for playback on other portable devices.

Other Download:
- Pavtube old official address: http://www.pavtube.com/hd-video-converter-mac/
- AppStore Download: https://itunes.apple.com/de/app/pavtube-hd-video-converter/id502792488?mt=12
- Amazon Download: http://www.amazon.com/Pavtube-Video-Converter-Mac-Download/dp/B00QI9GNZS
- Cnet Download: http://download.cnet.com/Pavtube-HD-Video-Converter/3000-2194_4-76177786.html
How to encode Camcorder video to FCP for Professional Editing?
Step 1: Input Camcorder video files.
Start the program on your computer, add Sony XAVC S 4K video to the program by clicking the “Add Video” or “Add folder” button.
Step 2: Choose Apple Prores format to output.
From “Format” drop-down option, choose “Final Cut Pro”> “Apple Prores 422(*.mov)” as output format. To output higher quality video, it is ideal for you to output “Apple Prores 422(*.mov)” or “Apple Prores 422(HQ)(*.mov)” format. To output small size video, choose Apple Prores 422(LT)(*.mov) or Apple Prores 422(Proxy)(*.mov) format.
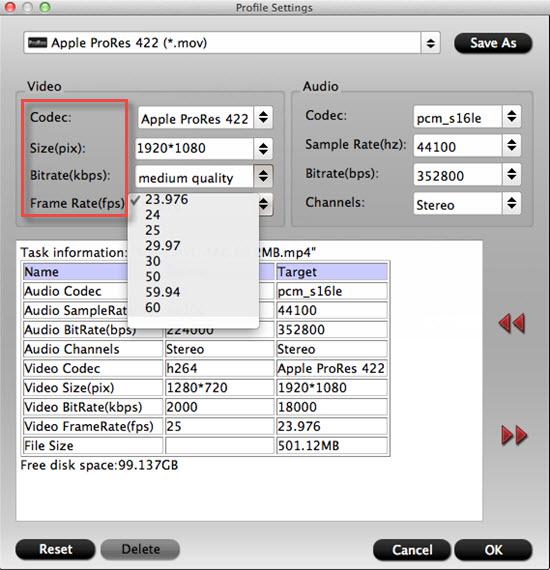
Step 3: Customize output video and audio settings.
Open “Profile Settings” window to adjust output video and audio parameter settings according to your own preference.
Step 4: Start the conversion process.
After all the setting is over, go back to the main interface and hit right-bottom “Convert” button to start Camcorder video to FCP Apple Prores 422 conversion process.
When the conversion is completed, launch FCP, go to “File” > “Import” > “Media” to add the converted prores files to FCP for further professional editing. You do not need to check “Create Optimized Media” or “Create Proxy Media” option since we already converted the media to ProRes which means Final Cut Pro can use the footage without “optimizing” it. Checking this box would create a redundant and time consuming second transcode of your footage.


