Have some MP4 video stored on your computer’s local hard drive and wish to insert the MP4 video into PowerPoint for creating memorable presentations? The good news is that you are using the upgraded PowerPoint Presentation of 2010, 2013 or 2016, you will then got the chance to embed and even play the video during the PowerPoint presentation, however, this doesn’t work for the old versions like PowerPoint 2003 or 2007. The bad news is that PowerPoint has strict limitation on the file formats added to it. You may fail to insert the MP4 video into PowerPoint if the MP4 file is not compatible with PowerPoint. The following article will show you how to free convert unsupported MP4 to PowerPoint Presentation 2010, 2013 or 2016.
Supported file formats by PowerPoint 2010, 2013 or 2016
To insert video into PowerPoint, we should first be clear of what file formats can be added to PowerPoint, from the official page of Microsoft PowerPoint official page, we find the following information:
Video: In PowerPoint 2013 and later, and in PowerPoint 2016 for Mac, for the best video playback experience, we recommend that you use .mp4 files encoded with H.264 video (a.k.a. MPEG-4 AVC) and AAC audio. In PowerPoint 2010, we recommend that you use .wmv files.
Audio: We recommend using .m4a files encoded with AAC audio. In PowerPoint 2010, we recommend that you use .wav or .wma files.
Concluded from above information, we can see the best video formats for PowerPoint 2013, 2016 is MP4 file with H.264 video codec and AAC audio codec while the video formats for PowerPoint 2010 is WMV file with .wav or .wma audio codec.
Free convert incompatible MP4 for PowerPoint 2010, 2013 or 2016
It is well known that MP4 is a container file format which can hold various different video or audio compression codec listed below:
Video codec: MPEG-1, MPEG-2, MPEG-4 (A)SP, H.264/MPEG-4, H.265/HEVC, VC-1/WMV, Real Video, Theora, Microsoft MPEG4 V2, VP8, MVC
Audio codec: MP3, WMA, AAC, AC-3, DTS,ALAC, DTS-HD
If the MP4 is encoded with any one of PowerPoint not readable video or audio codec, you will fail to add the video into it. To fix this codec incompatible issue, what you need is a simple video converter. If you are looking for free yet powerful solution to get the job done, we highly recommend Pavtube Free Video DVD Converter Ultimate to you. The program can assist you to comprehensively convert MP4 files compressed with all above listed unsupported video and audio codec to PowerPoint Presentation 2010 playable wmv files with wma or wav audio codec.
Trim or split MP4 video or PowerPoint Presentation
As the file size of the video will influence the video embedding time, therefore, if you wish to shorten the PowerPoint video inserting time, you can use the program’s built-in trimming function to reduce the video file length or split large video into small parts by file size, count for length.
Pavtube Free Video DVD Converter Ultimate is a 100% free Video DVD Conversion application developed by Pavtube Studio. Unlike other poor-quality free video converters that try to install adware and other junk when you download them, the program is very clean and safe since it doesn’t feature any ads or bundled adware. The program is very easy to use, no matter experienced user or fresh could handle it very well. What’s more, the results produced by the program are pretty high quality, you can’t tell the difference between the convert video and the original MP4 video.
Note: As Free Pavtube Free Video DVD Converter Ultimate lacks the ability to output the best embedding formats H.264 video for PowerPoint 2013 or 2016, you will need to upgrade it to the paid version Pavtube Video DVD Converter Ultimate for only $39.2 to produce your desired file formats.


How to Free Convert and Insert MP4 to PowerPoint Presentation 2010, 2013 and 2016?
Step 1: load MP4 video.
Download the free MP4 Video Converter. Launch it on your computer. Click “File” menu and select “Add Video/Audio” or click the “Add Video” button on the top tool bar to import unsupported MP4 files into the program.

Step 2: Define the output format.
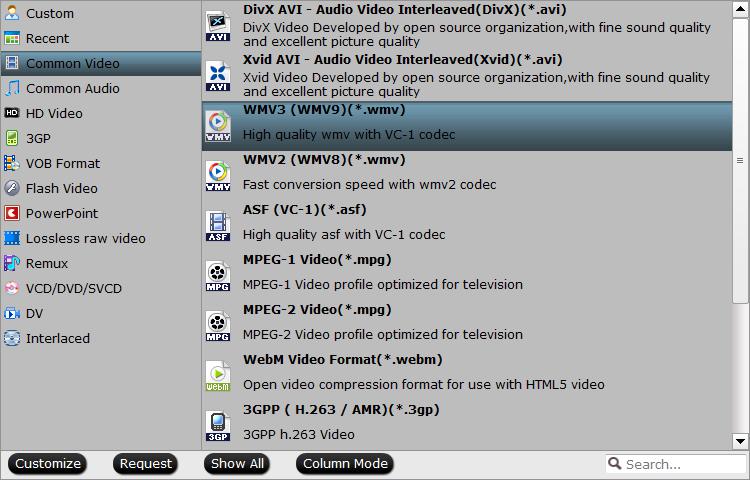
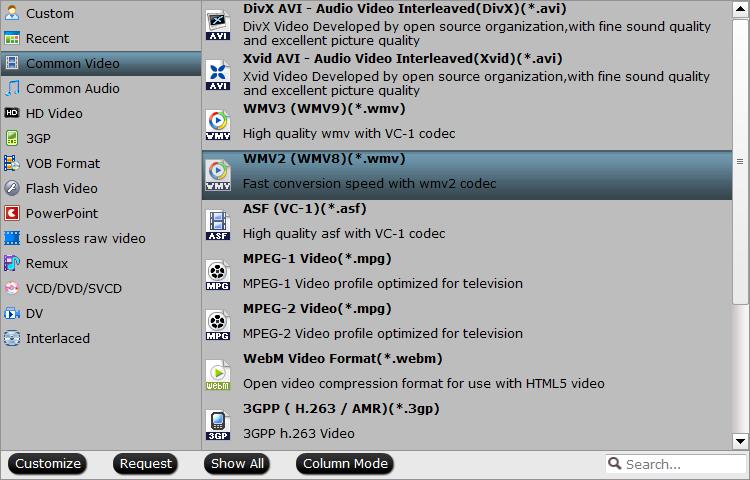
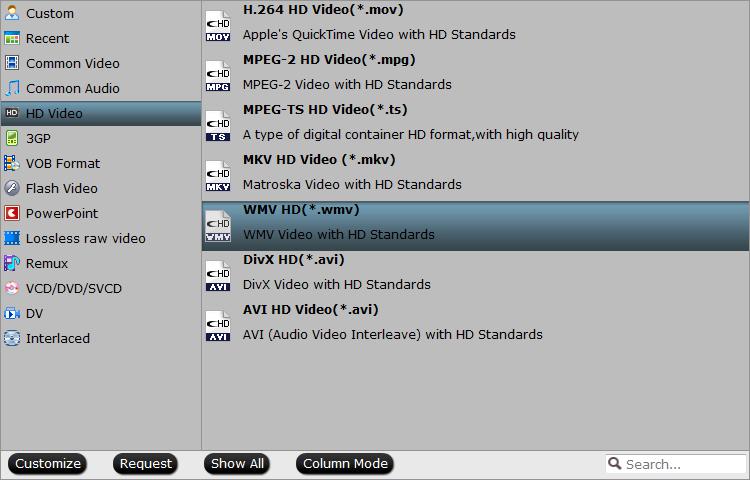
Clicking the Format bar, from its drop-down list, output PowerPoint Presentation 2010 supported WMV file formats. There are 3 types of WMV file format output option, you can choose your desired one according to your own needs.
Output to high quality WMV video with VC-1 codec
Fast conversion speed with wm2 codec
Output HD WMV video
For outputting PowerPoint 2013 or 2016 best supported mp4 video with H.264 video codec and AAC audio codec,upgrade Pavtube Free Video DVD Converter Ultimate to the paid version.
Step 3: Trim or split MP4 video.
In the video editor window, choose the “Trim” tab and this tab is selected by default when the editing window appears. You can use the trim function to cut off unwanted parts from start and end. You can either drag pointers on the process bar or set exact time point in Start and End boxes to set.

Split large MP4 file into small pieces
Click the split button on the file list to launch the Video Split window. Ticking “Enable” option, you can split the file by file count, time length, or file size.

Step 4: Begin the conversion process.
After all setting is completed, hit right-bottom “Convert” button to begin the conversion from MP4 to PowerPoint 2010, 2013 or 2016 best recommended format.
When the conversion is completed, click “Open Output Folder” icon on the main interface to open the folder with generated files.
Then follow the steps below to insert the video into PowerPoint 2010, 2013 or 2016
1. Open the slide you want to add the video to.
You can embed the video on any slide in your presentation.
2. Click the “Insert” tab.
This will display the various Insert options.
3. Click the “Video” button in the “Media” section.
A small menu will appear.
4. Select “Video on My PC.”
This will open the file browser. If you’re using a Mac, select “Movie from File.”
5. Find the video you want to add.
Use the file explorer to browse for the video file that you want to add.
6. Wait while the video is added to your presentation.
The time this takes will vary depending on the size of the video. The progress will be displayed at the bottom of the screen.
7. Click the “Playback” tab.
This will allow you to adjust playback settings for the video that you’ve added. If you don’t see the tab, make sure the video has been selected.
8. Use the “Start” drop-down menu to select how the video will start playing.
By default, the video will need be clicked in order for the video to start playing. If you select “Automatically,” the video will start as soon as the slide opens.
You can have the video loop or rewind automatically by checking the appropriate boxes.
9. Resize the video by dragging the corners.
You can make the video different sizes by dragging the corners. You can click and drag the video to reposition it on the slide.
10. Save your presentation with your embedded video.
Your video is embedded in the presentation, which includes the video inside of the PowerPoint file. You won’t need to worry about sending the video along with the presentation, since it’s packed into the presentation itself. This means that your presentation file size will increase to include the full video file.
– You don’t need to do anything special to save the presentation with the embedded file. Just select “Save” from the File tab and save your presentation like you normally would.