

Still puzzled with the questions on how to smoothly import your XAVC .mxf files to Avid Media Composer for editing? Here is the right place you come! Best XAVC .mxf solutions are offered here to help us make XAVC accepted by Avid MC well both on Windows and Mac. Let’s together see how to below:

“I just got a new Sony F55 for summer vacation and shot lots of videos. The final goal is to edit some of them in Avid Media Composer. I know that these XAVC footage need to transcode, but the problem is that I just need to extract some part of them to edit and don’t want to waste lots of time converting the full length. Is that possible?”
Why does this situation always happen between XAVC .mxf and Avid Media Composer?
If you know well about the best video formats for Avid MC, we may know that it refuses the incompatible codec form some HD camcorders, such as the H.264, H.265, etc. On the other hand, if you know the DNxHD MOV can be the best one supported by Avid MC, you are going to seek third way to convert the XAVC .mxf to DNxHD MOV. So in order to solve such problems, we need some useful XAVC tips here.
How to import XAVC .mxf files to Avid MC on Windows/Mac with easy workflow?
In fact, for a quick and smooth XAVC workflow in Avid, sometimes, we may think of some third-party XAVC plug-ins. Cause it is said, some third-party tools will crash when importing the original videos with the unstable capability. Here is the professional XAVC converting assistant introduced to you—Pavtube Video Converter for Windows/Mac, which has the strong ability of working the XAVC files well in other NLEs or media devices. With the upgraded version, this program especially fixes the problems of XAVC bugs so now we can work well with a faster speed and stable capability.


Steps on converting XAVC.mxf to DNxHD MOV for editing in Avid MC nicely:
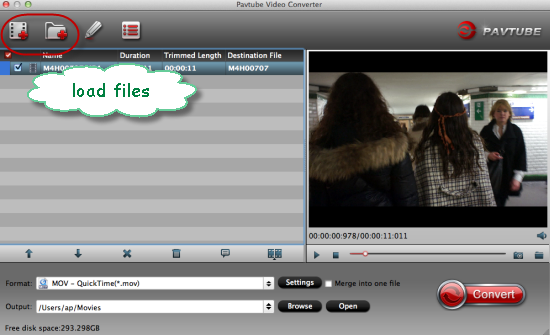
Step 1. After downloading, install and run this XAVC Converter for Avid, just copy the XAVC files to your hard drive. Then click ‘Add Video’ to import the files to the software for converting.
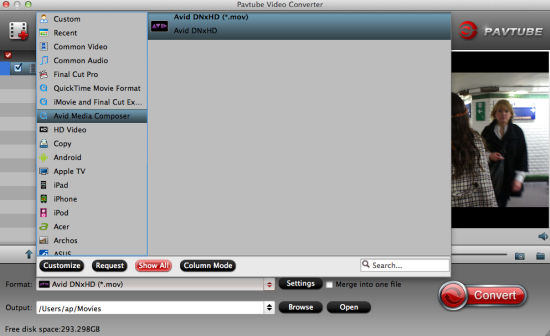
Step 2. Click Format on the main interface and choose ‘Avid Media Composer > Avid DNxHD (*.mov)’ as output format. It ensures the best quality while working with the output files in Avid.
Tips: With the latest version of this program, we can easily decode and encode the HEVC files on Macsmoothly with a high quality preserved.
Step 3. Click the “Settings” button and set proper video/audio parameters. You can reset set the video size, bitrates and frame rate, audio sample rate, audio channel. If you would like to use default settings, simply skip this step.
Finally, if you have done all the preparation work above, why not go back to the main interface to click the ‘Convert’ button to get the work started? With the easy to use operation and faster speed, we are glad to edit the files after transferring into Avid MC there. Just enjoy yourselves!
More from my site
 Workflow on MPEG-4/H.264 Footage to Final Cut Pro X
 Convert BDMV Files for QuickTime, iMovie, FCP on Mac Perfectly
 Back to School Sales with Pavtube HD Video Converter
- Transfer Any Videos from iPhone to iMovie on Mac?
 Play AVCHD Videos with VLC and QuickTime on Yosemite
 Upload XAVC S to Vimeo/Facebook/Youtube for Sharing


