“I have used my Sony camcorder and recorded some high-definition footages at last weekend, the recorded videos are in .MTS format, now I need to import MTS to FCP X for editing, but I always encounter problems when I trying to import MTS to FCP X directly, it seems that I need a MTS plugin for FCP X for importing, any suggestions?”
Maybe you are looking for a MTS to FCP X importing plugin, but it is not easy to find a good plugin that works, since there are many kinds of video codes used by cameras and camcorders, you’d better find a better way to import MTS to FCP X without plugins.
Many users have encountered problems just like the situation mentioned above when importing MTS to FCP X for editing on Mac, the main reason is that MTS video format is not supported for editing in FCP X directly and natively, FCP X best compatible video codec is Apple ProRes codec MOV format.
In this case, the best way we tested to import MTS to FCP X natively without plugin is to convert MTS to Apple ProRes codec, which is native codec for FCP X, once you converted MTS to Apple ProRes, you can import MTS to FCP X without any problems, and you don’t need to render, you can edit the video natively in FCP X on Mac.
Of course, to do the video conversion, you need a professional app. Here the professional MTS to FCP Video Converter for Mac is strongly recommended. Named Pavtube MTS/M2TS Converter for Mac (Best MTS/M2TS Converter for Mac Review), with it, just in a few clicks you could successfully upload MTS videos to FCP X.
Key Features:
- Three simple clicks to convert MTS videos to Final Cut Pro compatible formats.
- Aside from FCP, you can directly convert MTS to iMovie, QuickTime, Windows Movie Maker and more video editors supported formats without additional settings.
- Edit your MTS videos before converting them. With the built-in editor, you can trim or crop your videos. And you are able to add subtitles and watermarks to the videos as well.
- Perfectly compatible with Mac OS X 10.11 El Capitan, 10.10 Yosemite, 10.9 Mavericks, 10.8 Mountain Lion, 10.7 Lion and 10.6 Snow Leopard.
Now you can free download this MTS to FCP X Apple ProRes Codec Converter, install and run it, you will see the interface.
1.When converting video to Final Cut Pro oriented format templates(e.g. Apple Prores), please ensure that your computer has Final Cut Pro installed, otherwise the converted files will have audio only without image.
2.If you are using FCP X, please make sure you have installed ProApps QuickTime Codecs, or you may get files with sound only without video.
Step-by-Step Guide:
Step 1. Click the “Add File” button to select the MTS videos from your hard drive to this program. To save your time, this program supports batch conversion so you can add multiple files at a time. 
Tips: When the MTS files are loaded to the Pavtube MTS/M2TS Converter, you can view the videos from the Preview window. Simply select an item and click the “Play” button. When the video is playing, you are allowed to take snapshoot.
Step 2. Choose output format, to edit videos on Final Cut Pro X native codec, you are recommended to choose Final Cut Pro -> Apple ProRes 422 (*.mov), it’s best for Final Cut Pro X editing. 
Read the difference of ProRes.
• Apple ProRes 422 – Higher quality than Apple ProRes 422 (LT);
• Apple ProRes 422 (HQ) – Keep original video quality for editing in FCP;
• Apple ProRes 422 (LT) – Get a smaller file sizes than Apple ProRes 422;
• Apple ProRes 422 (Proxy) – SD levels – 480i/p and 576i/p. Used in offline workflows.
• Apple ProRes 4444 – Edit and finish 4:4:4 material.
Actually, different Apple ProRes codec corresponds to different needs. Here you can refer to this article “Differences among Apple ProRes codec“.
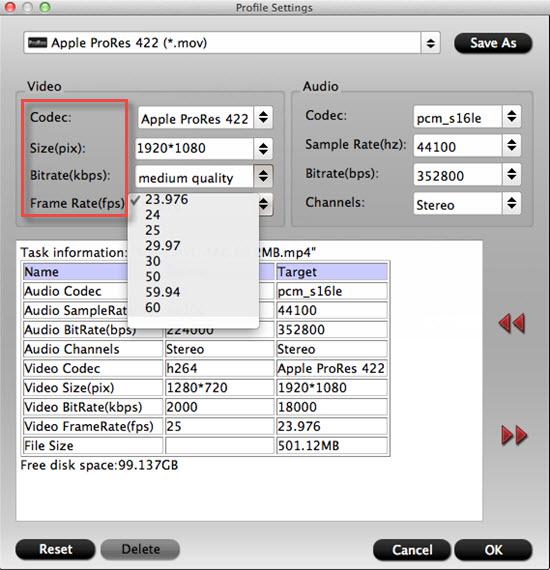
Step 3. You can click “settings” to adjust the output parameters, like resolution, bitrate, etc. Don’t forget the balance between video quality and size. 
Step 4. Click the “Convert” button to start converting MTS to Apple ProRes 422. After that, click the “Open” button to locate the output files and transfer the files to FCP X as usual.
Launch Final Cut Pro X, choose File >> Import >> Files…, and browse to where you save the converted AVCHD clips to. Choose the videos that you’d like to add.


