

Have downloaded some YouTube video to your local computer hard drive and wish to find a free desktop YouTube video cutter tool to cut unwanted parts from the YouTube video or trim a long YouTube video from 10 minutes to 5 minutes for embedding on your website or PowerPoint Presentation. The following article will share you two desktop tools to free cut YouTube video offline.
Free cut YouTube video with Pavtube Free Video DVD Converter Ultimate
Different from some free online YouTube video cutter tool that try to install adware and other junk when you download the trimmer video to computer, Pavtube Free Video DVD Converter Ultimate is 100% clean, there is no spyware, no malware, no adware and no virus. With this program, you can simply cut unwanted parts from your Downloaded YouTube video with perfect quality and super fast cutting speed in the following 3 different ways:
1. Drag the control sliders to include the segment you want to remain.
2. Click the left square bracket to set start point, and click the right square bracket to set end point when previewing the video.
3. Input specific values to “Start” and “End” box.
Related article: Trim MP4 Files on Mac | 5 Ways to Cut AVI Video
To better share your trimmed YouTube video, the program does you a great favor to convert the cut YouTube video to various popular plain digital file formats such as AVI, WMV, MP4, MOV, MKV, 3GP, WebM, etc with different video and audio encoding codec and file resolution. Besides that, you can also use the program to directly output YouTube video to hot devices and programs preset profile formats with the optimal playback and editing settings.
Besides cutting YouTube video for you, you can also use the program to do other simple editing work with the downloaded YouTube video, you can merge separate video clips into one, split large video into small parts by file size, count or length, add video/image/transparent text watermark to video, apply special rendering effect, change picture effect, insert external subtitle, etc.


How to Free Cut YouTube Video with Pavtube Free Video DVD Converter Ultimate
Step 1: Import downloaded YouTube video.
Download the free trial version of the program. Launch it on your computer. Click “File” menu and select “Add Video/Audio” or click the “Add Video” button on the top tool bar to import source video files into the program.

Tips: The program supports batch conversion mode, you can load multiple YouTube video for cutting.
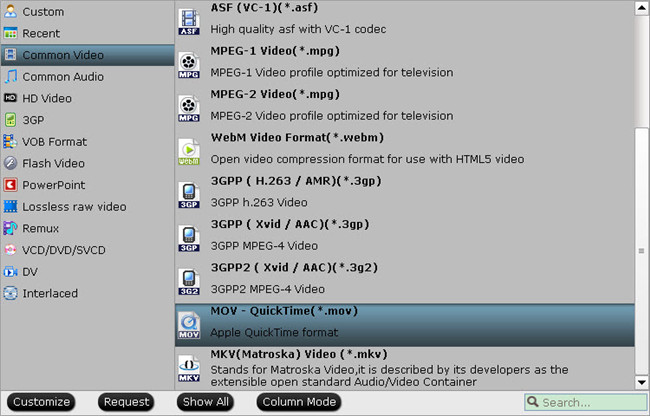
Step 2: Define the output format.
Clicking the Format bar, from its drop-down list, select one of your desired file format to output, you can choose to preserver the original YouTube file format, or output YouTube to any of your desired digital file formats.
Step 3: Cut YouTube videos.
In the video editor window, choose the “Trim” tab and this tab is selected by default when the editing window appears. You can use the trim function to cut off unwanted parts from start and end. You can either drag pointers on the process bar or set exact time point in Start and End boxes to set to leave only your wanted parts.

Step 4: Begin the conversion process.
After all setting is completed, hit the “Convert” button at the right bottom of the main interface to begin YouTube video trimming process.
When the conversion is finished, click “Open Output Folder” icon on the main interface to open the folder with generated files. Then you can get a short YouTube video with only your unwanted parts or segments.
Free YouTube video frame accurate cutter tool – Pavtube Media Magician for Windows/Mac
The condition is that you have multiple downloaded YouTube video and you want to take some of the frames from these videos, however, most video cutter tools on the market only give you the option to cut a specific part from a video, but you are not allowed to flexibly to cut any of your any frames from the YouTube video and then join them together for further usage.
Fortunately, here comes Pavtube Media Magician for Windows/Mac, which allows you to drag and drop the downloaded YouTube video to the timeline, so that you can easily cut video by frame accurately, trash undesired frames and join your wanted frames together.


How to Accurate Trim YouTube Video Frame with Pavtube Media Magician?
Step 1: Import YouTube video from hard drive.
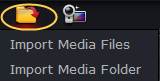
To import YouTube video video files from hard drive to Media Magician, proceed as either way follows:
a. Drag and drop source files to source area directly
b. Click folder button to choose import media files, or import the whole folder.
Step 2: Trim YouTube video frame by frame on the timeline.
The program allows you to manage movies using a timeline, drag and drop the video files to Timeline, then you can manage it into movie. This function makes trim video clips at just the right moment easy. Now enhanced with frame accurate seeking, you can cut movies at a very precise point.

Just double click the video in Timeline and view it in Player, then use the Previous Frame or Next Frame Button to make sure you get the correct point. Then click split button to cut it.
For frame by frame cutting, suggest you to use Vernier to locate the starting and ending frame of the clip and then click Split to cut into two parts, after that, you can click “Delete” to delete the part you don’t want.
Step 3. Select output format.
Choose “Output” in the main interface to switch to Output window. Media Magician comes up with massive output formats (AVI, WMV, MKV, MPG, H.264, TS, MOV, MP4, etc).
Step 4. Convert Trimmed YouTube video to desired format.
Click “Plus” icon to add conversion task before selecting output format. Click on the triangle on the task to get the app start trimming and converting YouTube video to your desired file format.
More from my site
 Top 7 MKV Cutter You Need to Know
 5 Ease to Use FreeWare Video Converter
 Insert Youtube (FLV) into PowerPoint 2016, 2013, 2011, 2010, 2009, 2007… On macOS Sierra
  YouTube to VOB – Choose Professional YouTube to VOB Converter for Mac/Win
 Upload DVD to YouTube Smoothly With Best Quality
  Free Convert MP4 to Divx for Divx Certified Devices


